How to Install Openclaw using Docker
This article will guide you through the process of installing Openclaw using Docker and Docker Compose, including preparation, configuration, and service startup steps with Youtube video.
Pros and Cons of Running Openclaw with Docker
Pros:
- Fast & Isolated Deployment: Quick setup in an isolated environment, reducing host impact.
- Portable & Resilient: Easy to back up, move, and redeploy with consistent settings; supports 24/7 operation and simplified version management.
- Secure: Requires fewer direct host permissions.
Cons:
- Learning Curve: May be challenging for users unfamiliar with Docker.
- Backup Responsibility: Requires active management of backups to preserve data.
1. Preparation
Before you begin, you need to prepare the following information:
-
Required API keys:
- Telegram bot API:
1234567890:AAH_XYZ_mock_token_abcdefghijklmnopq - ChatGPT Codex account (or corresponding API key if available)
- Telegram bot API:
-
Optional API key (can be added later):
- Tavily search API:
TAVILY_API_KEY–> Tavily Search- As of version 2026.3.22, Openclaw supports Tavily Search in the onboard configuration. Using Tavily is more convenient than Brave Search as it does not require adding credit card information.
- Brave search API:
BSAQqhUi1Yx-ABCDEFGHIJKLMNOPQRSTUVWXYZ_RSLF- For OpenClaw to automatically search for information online (read news, retrieve real-time data, etc.), configuring the Brave Search API is a powerful option and can be added later.
- Tavily search API:
2. Openclaw installation
Create the Openclaw installation directory:
mkdir openclaw
cd openclaw
You will then create config and workspace directories inside this openclaw directory.
Create Configuration and Workspace Directories
Create two directories, config and workspace, to store Openclaw’s configuration data and workspace. Then, grant ownership to the user with UID 1000 (typically a non-root user within the container).
mkdir config workspace
sudo chown -R 1000:1000 ./config ./workspace
3. Create the Docker Compose File
Create a docker-compose.yml file with the following content to define the Openclaw service:
services:
  openclaw:
    image: ghcr.io/openclaw/openclaw:latest
    container_name: openclaw_cli
    restart: unless-stopped
    environment:
      - HOME=/home/node
      - TZ=Asia/Ho_Chi_Minh
    volumes:
      - ./config:/home/node/.openclaw
      - ./workspace:/home/node/.openclaw/workspace
Explanation:
image: ghcr.io/openclaw/openclaw:latest: Uses the latest Openclaw version from the GitHub Container Registry.container_name: openclaw_cli: Names the containeropenclaw_cli.restart: unless-stopped: The container will automatically restart unless you manually stop it.environment:HOME=/home/node: Sets the HOME environment variable inside the container.TZ=Asia/Ho_Chi_Minh: Sets the timezone for the container.
volumes:./config:/home/node/.openclaw: Mounts theconfigdirectory on the host to Openclaw’s configuration directory inside the container../workspace:/home/node/.openclaw/workspace: Mounts theworkspacedirectory on the host to Openclaw’s workspace directory inside the container.
4. Run and Check Logs
Start the Openclaw service using Docker Compose and check the logs to ensure everything is running correctly:
docker compose up -d
docker compose logs -f
docker compose up -d: Starts the services defined indocker-compose.ymlin detached mode (in the background).docker compose logs -f: Displays the logs of the services and follows new logs.
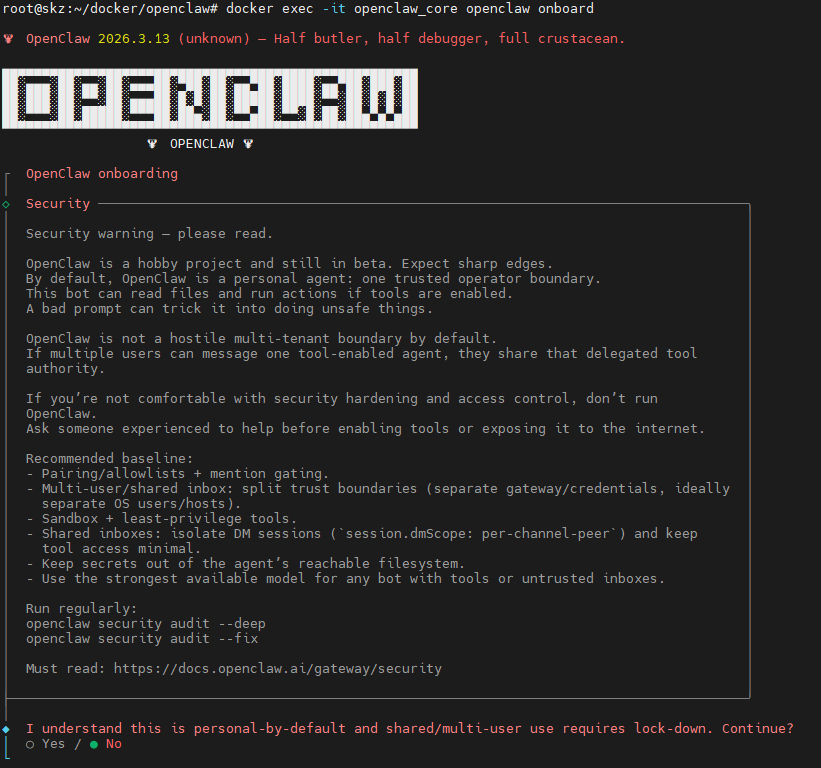
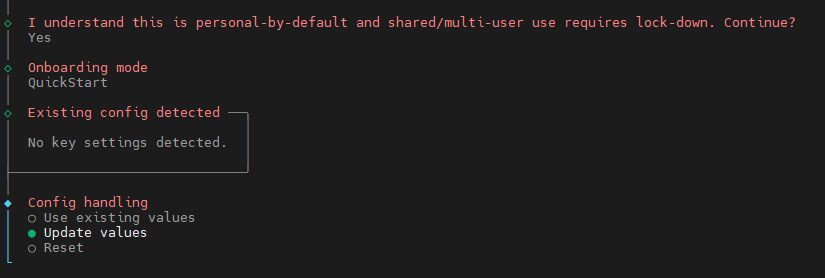
5. Onboard to Add Tokens
Once the container is running, you need to perform the onboarding process to add API tokens (such as Telegram and Brave Search).
docker exec -it openclaw_cli openclaw onboard
Follow the on-screen instructions to complete your installation.
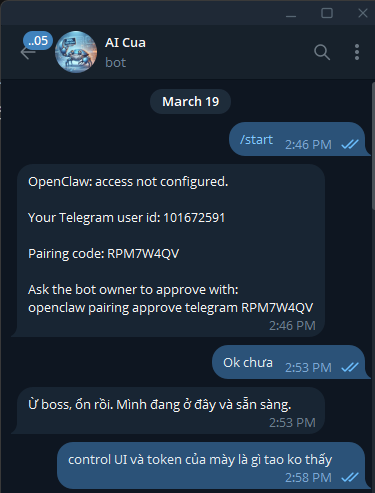
6. Get Pairing Information for Telegram
To connect with Telegram, you need to get the pairing information. Run the following command and follow the instructions to approve pairing via Telegram:
docker exec -it openclaw_cli openclaw pairing approve telegram RPM7W4QV
(Note: RPM7W4QV is an example; the actual pairing code will be provided during the onboarding process or from Openclaw’s.)
7. Restart Docker to Enable Brave Search
After adding the Brave Search API token, you need to restart the Openclaw container for the changes to take effect and the Brave Search service to be activated:
docker compose restart
8. Conclusion
You have successfully installed Openclaw using Docker. It’s important to remember that the effectiveness and capabilities of the agent within Openclaw are highly dependent on the underlying AI model you configure. When newly installed, the agent is like a child; you must teach it by creating many skills tailored to your specific needs for it to become truly productive.