Build Your Own OpenWRT Firmware for a Router
 _______                     ________        __
 |       |.-----.-----.-----.|  |  |  |.----.|  |_
 |   -   ||  _  |  -__|     ||  |  |  ||   _||   _|
 |_______||   __|_____|__|__||________||__|  |____|
          |__| W I R E L E S S   F R E E D O M
OpenWRT is a customized firmware platform supported on many router models. Replacing the manufacturer’s default firmware with OpenWRT gives you far greater flexibility in configuring your router and installing additional packages. For many supported routers, you can simply download a pre-built firmware image from the official repository and upgrade your device.
However, if your router is experimental—or you want to integrate custom packages directly into the firmware image—building your own OpenWRT is the best option. Although the build process is straightforward, it may look intimidating for beginners. This guide walks you through the steps clearly.
Requirements
You will need a working Linux environment such as:
- Ubuntu or Debian VM
- Physical Linux system
✅ “IMPORTANT: Do NOT execute these commands as the root user.”
Install Required Packages
First, update your system:
sudo apt update && sudo apt upgrade -y
Check your Linux version:
lsb_release -a
Example output:
No LSB modules are available.
Distributor ID: Ubuntu
Description:    Ubuntu 18.04.5 LTS
Release:        18.04
Codename:       bionic
Depending on the Linux distribution, the required packages vary. You can view the complete list here
Install dependencies (example for Ubuntu 18.04 LTS):
sudo apt-get install subversion build-essential libncurses5-dev zlib1g-dev gawk git ccache gettext libssl-dev xsltproc zip python
⚠️ Python 2 is required because some OpenWRT build scripts still depend on it.
Download the OpenWRT Source & Build
1. Clone the repository
git clone https://github.com/openwrt/openwrt.git
cd openwrt
2. List branches and checkout a specific version
git branch -a
git checkout openwrt-19.07
3. Update and install feeds (packages)
./scripts/feeds update -a
./scripts/feeds install -a
If you receive missing dependency errors, install them and run the commands again.
4. Configure the build
make menuconfig
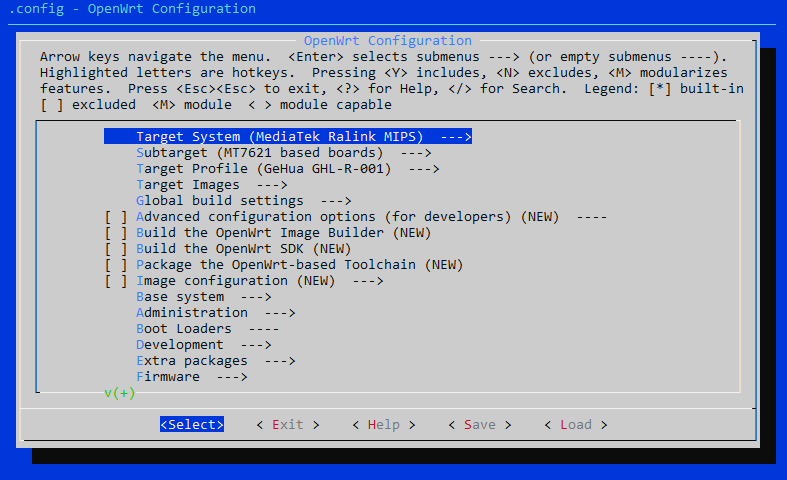
Firmware configuration options for OpenWRT before building
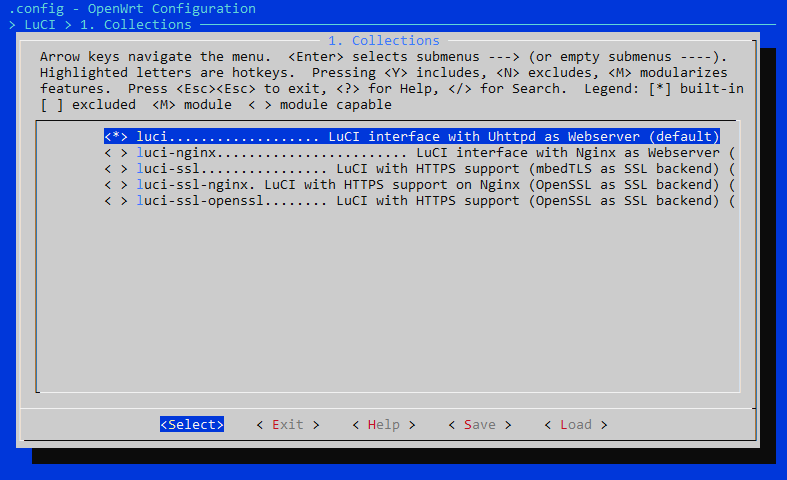
Integrate the LuCI GUI into your OpenWRT firmware image
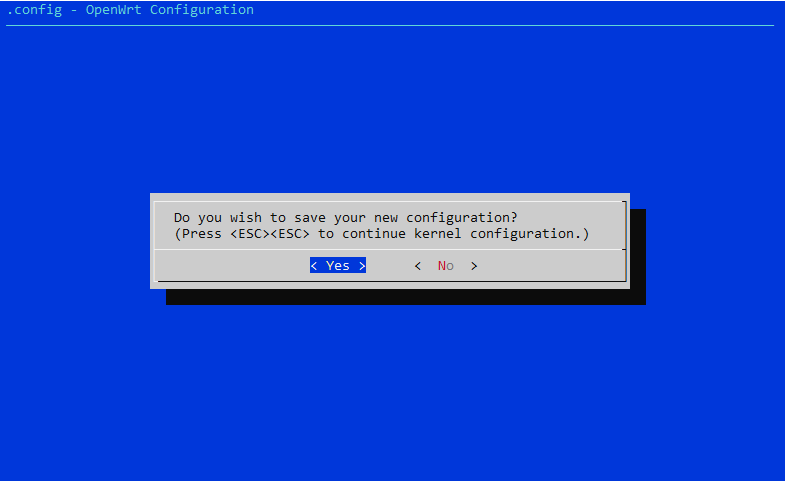
Saving the Firmware Build Configuration
Inside the menu you can:
- Select CPU/SoC target
- Choose packages
- Enable kernel options
- Include LuCI web interface modules
Save configuration and start the compilation:
make
⏳ First build takes hours depending on hardware. Next builds are faster.
5. Locate firmware output
After completion:
-
Firmware files appear in the
bin/directory -
Usually you will find:
- sysupgrade image → used for upgrading from existing OpenWRT
- factory image → used for first-time flashing (via vendor UI or serial)
Recommended Packages to Add
WireGuard VPN
In menuconfig enable:
luci-proto-wireguard(LuCI → Protocols)luci-app-wireguard(LuCI → Applications)kmod-wireguard(Kernel modules → Network support)wireguard-tools(Network → VPN)
Or install later after flashing:
opkg update
opkg install luci-app-wireguard luci-proto-wireguard kmod-wireguard wireguard-tools wireguard
reboot
OpenVPN
Install via terminal:
opkg update
opkg install openvpn-openssl luci-app-openvpn
reboot
TUN/TAP Support
Enable in:
Kernel modules → Network support
Done
You now have a custom-built OpenWRT firmware:
- Tailored for your hardware
- Preinstalled with packages you need
- Ready for deployment
Errors
The error you’re encountering happens because Git loses the connection while cloning a large repository (OpenWrt).
Cloning into 'openwrt'... remote: Enumerating objects: 27621, done. remote: Counting objects: 100% (27621/27621), done. remote: Compressing objects: 100% (11741/11741), done. error: RPC failed; curl 56 GnuTLS recv error (-9): Error decoding the received TLS packet. fetch-pack: unexpected disconnect while reading sideband packet fatal: early EOF fatal: fetch-pack: invalid index-pack output
Fix it:
Increase the Git buffer size
git config --global http.postBuffer 524288000
git config --global http.maxRequestBuffer 1000M
git config --global http.sslVerify false
git config --global core.compression 0