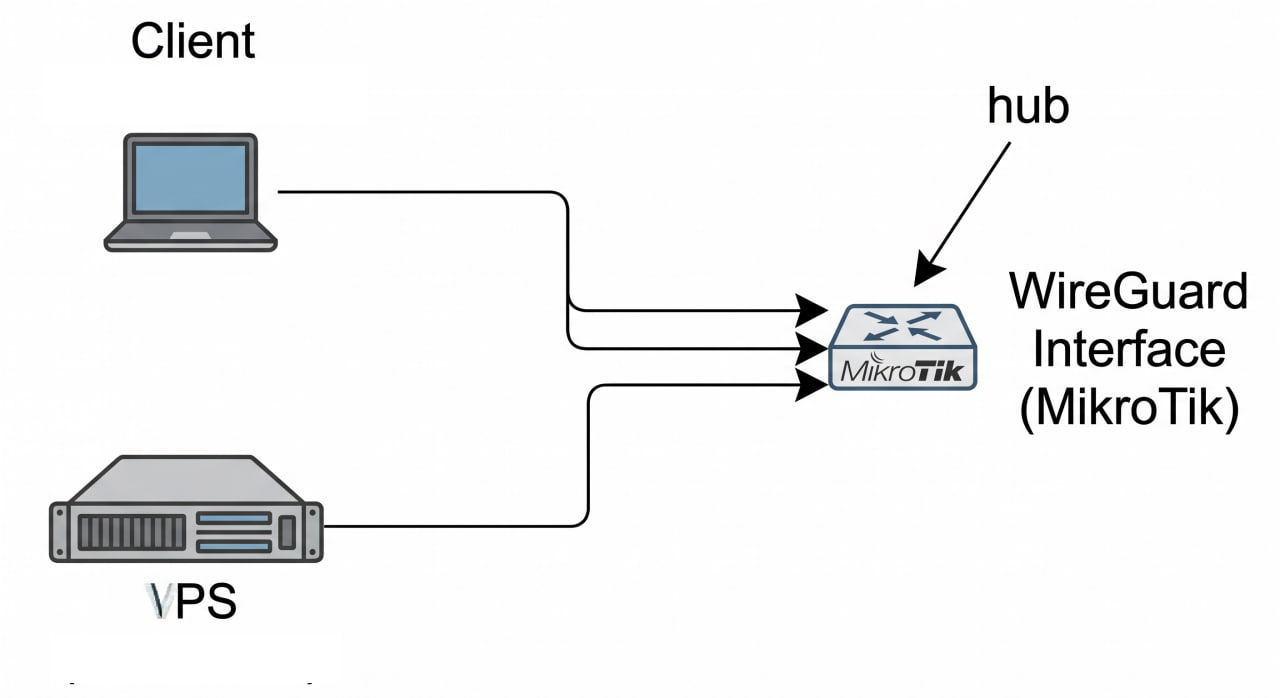
This post summarizes a real debugging and configuration process to make two WireGuard peers ping each other through a MikroTik router acting as the central hub.
Context Topology:
Peer A (Client) (10.10.0.10) --+ +--> WireGuard Interface (MikroTik) <-- hub VPS (10.10.2.1) ---------------+ Environment:
MikroTik router acts as the WireGuard hub, with 10.10.0.1/24 on the WG interface. Peer A (Client) connects to WG with 10.10.0.10/32. VPS connects to WG with 10.
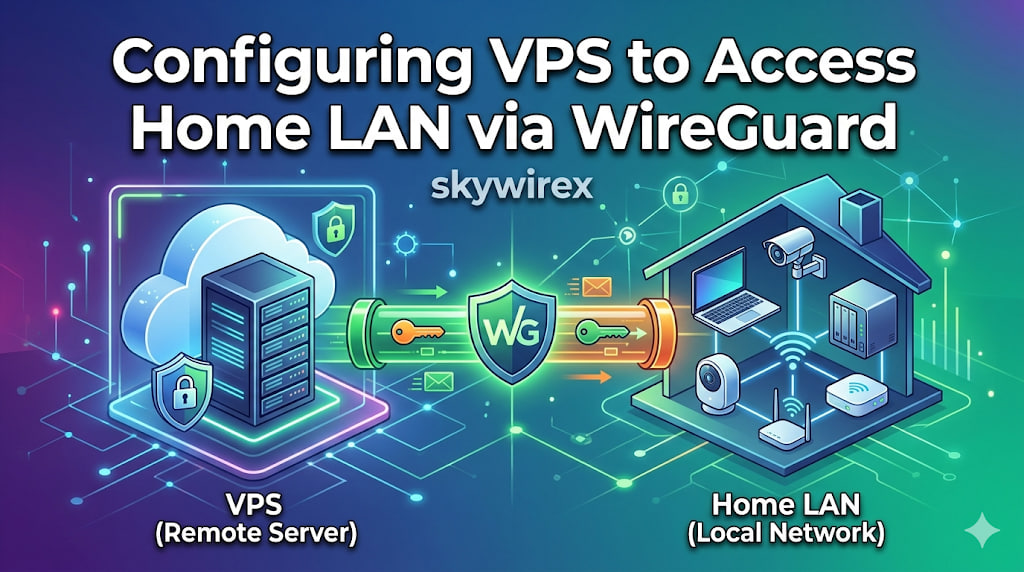
This article explains a setup where a VPS sends traffic through a home Internet connection using WireGuard, while still allowing access between the VPS and the home LAN.
Topology Internet <-> MikroTik (pppoe-out1) - Dynamic home IP via DDNS <-> WireGuard tunnel VPS (203.0.113.10) - wg0: 10.10.2.1/24 <-> LAN 172.16.0.0/24 1. VPS - /etc/wireguard/wg0.conf [Interface] Address = 10.10.2.1/24 ListenPort = 51820 PrivateKey = <private_key_vps> PostUp = iptables -A FORWARD -i %i -j ACCEPT; iptables -t nat -A POSTROUTING -o eth0 -j MASQUERADE; iptables -A FORWARD -o %i -j ACCEPT PostDown = iptables -D FORWARD -i %i -j ACCEPT; iptables -t nat -D POSTROUTING -o eth0 -j MASQUERADE; iptables -D FORWARD -o %i -j ACCEPT [Peer] # MikroTik PublicKey = <public_key_mikrotik> AllowedIPs = 0.
This guide provides a comprehensive walkthrough on establishing a secure WireGuard VPN connection between a Virtual Private Server (VPS) and a MikroTik router, enabling seamless access to your home Local Area Network (LAN) from your VPS. It details the necessary configurations for both the VPS and the MikroTik device, covering crucial steps such as WireGuard interface creation, peer setup, IP address assignment, routing, firewall rules, and Network Address Translation (NAT). By following these instructions, you will be able to securely extend your home network’s reach to your VPS, allowing you to interact with LAN devices as if you were directly connected.