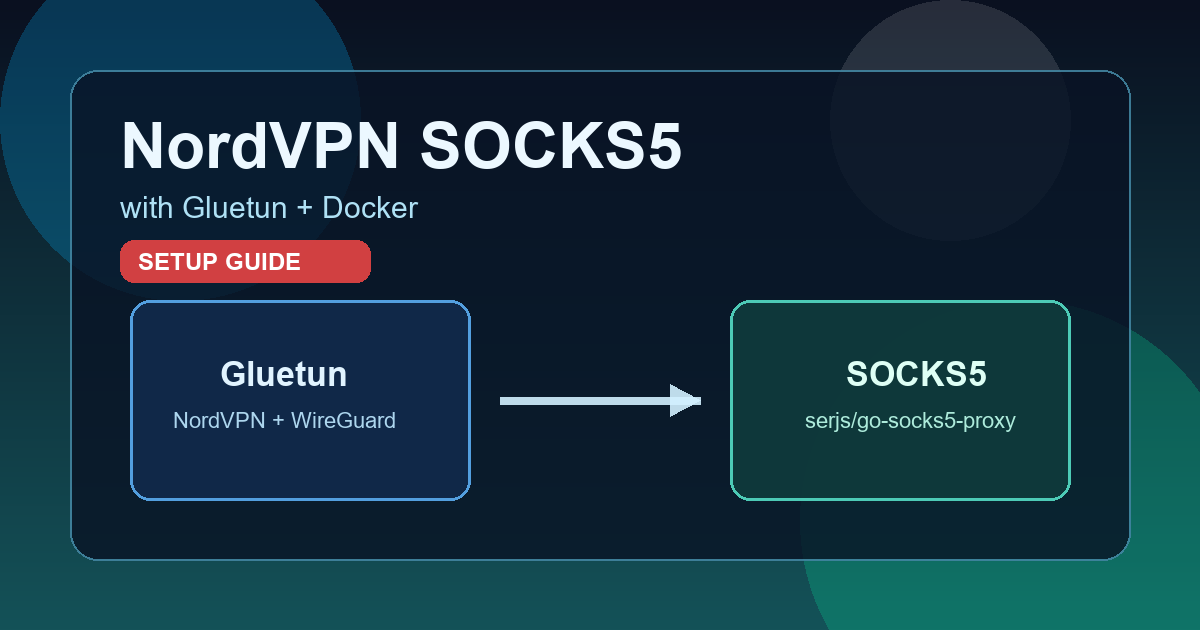
If you need a SOCKS5 proxy from a NordVPN WireGuard configuration, Gluetun alone is not enough.
Gluetun does not provide built-in SOCKS5 support. It offers an HTTP proxy and Shadowsocks, so the correct approach is to run a dedicated SOCKS5 container and make it share Gluetun’s network stack.
1. Get your NordVPN token (<YOUR_NORDVPN_TOKEN>) You can generate this token from your Nord Account:
Sign in to your Nord Account dashboard.
This guide shows how to connect OpenCode to a local CLIProxyAPI instance running in Docker and use RTK to compact bash output before OpenCode reads it.
Overview Flow OpenCode -> API call to http://localhost:8317/v1 CLIProxyAPI (Docker) -> forwards through OAuth subscription Claude / Gemini / Codex <- RTK hook compacts bash output before OpenCode reads it Step 1: Check That CLIProxyAPI Docker Is Running docker ps | grep cliproxy # Quick test curl http://localhost:8317/v1/models | jq # If you mapped a different port, replace 8317 accordingly.
This article will guide you through the process of installing Openclaw using Docker and Docker Compose, including preparation, configuration, and service startup steps with Youtube video.
Pros and Cons of Running Openclaw with Docker Pros:
Fast & Isolated Deployment: Quick setup in an isolated environment, reducing host impact. Portable & Resilient: Easy to back up, move, and redeploy with consistent settings; supports 24/7 operation and simplified version management. Secure: Requires fewer direct host permissions.
Part 1: Setting Up NFS on Your OpenMediaVault Server Part 2: Client-Side Automation with Autofs Part 3: Integrating Autofs with Docker (The rshared Magic) Managing network storage can be a headache, especially when you’re dealing with multiple services and containers. Manually mounting NFS shares is tedious, and getting Docker containers to reliably see those shares can be a whole other challenge.
In this post, these issues will be tackled head-on.
📘 Overview By default, Docker stores all its images, containers, and volumes under the directory /var/lib/docker.
However, you might want to move this directory to another drive or partition — for example:
Free up space on your system drive Use a faster SSD Keep Docker data separate from the OS This guide explains how to safely change Docker’s storage path for native Linux installations (not Docker Desktop).
🧭 Table of Contents Stop Docker Service Copy Existing Data (Optional) Configure Docker Daemon Reload and Restart Docker Verify the Change Important Notes Stop Docker Service Before making any changes, stop the Docker daemon to avoid data corruption:
Việc xây dựng Docker image đa kiến trúc chủ yếu dựa vào công cụ Docker Buildx. Công cụ này thường được tích hợp sẵn trong các bản cài đặt Docker mới, giúp đơn giản hóa quá trình tạo ra image tương thích với nhiều kiến trúc CPU khác nhau như linux/amd64 và linux/arm64.
Quy trình tổng quát để xây dựng Docker image đa kiến trúc với Buildx: 1. Đảm bảo Buildx khả dụng Kiểm tra Buildx có được cài đặt bằng lệnh:
Cài đặt fullnode blockchain Handshake Sử dụng Docker Có thể dụng dụng docker image do skywirex build sẵn ở Docker Hub
Tự build
### Clone source code
# git clone https://github.com/handshake-org/hsd.git
# cd hsd
### Thiết lập tham số cho image và build
# VERSION=$(cat package.json | grep version | sed 's/.*"\([0-9]*\.[0-9]*\.[0-9]*\)".*/\1/')
# COMMIT=$(git rev-parse --short HEAD)
# ARC=$(uname -m)
# docker build -t skywirex/hsd:$VERSION-$COMMIT-$ARC .
Theo hướng dẫn căn bản cuốn Monitoring With Prometheus của James Turnbull
Tạo thư mục prometheus cùng với file cấu hình prometheus.yml với nội dung như sau:
Chạy docker container trỏ đến file cấu hình vừa tạo:
docker run \ -p 9090:9090 \ -v ./prometheus:/etc/prometheus \ prom/prometheus Kết quả chạy không có lỗi tương tự như sau:
Chạy Prometheus bằng docker
docker run -d \ --name prometheus \ --net=host \ -p 9090:9090 \ -v .